

Andoni Iraola Tactics At Bournemouth 2025/2026: Why Is AFCB's Set-Piece Defence Failing? – Tactical Analysis

After 35 rounds in the Premier League, AFC Bournemouth are in sixth position with 52 points, just one place outside of the UEFA Champions League qualification spots.
Despite their fantastic position, Andoni Iraola's side is struggling defensively, having conceded 52 goals, making them the fifth-worst team in the Premier League for goals conceded after Burnley (68), Wolverhampton Wanderers (62), West Ham United (58), and Tottenham Hotspur (53).
As many as 17 goals, or 33% of those they've conceded this term, have come from set-pieces.
They have the worst set-piece defence record in the Premier League, alongside West Ham, in the relegation battle.
Furthermore, Bournemouth have the worst xG conceded from set-pieces in the Premier League this season (16.31).
Bournemouth do not employ a single designated specialist set-piece coach; instead, responsibilities are shared between assistant coaches Shaun Cooper (attacking set-pieces) and Tommy Elphick (defensive set-pieces) under manager Andoni Iraola.
In this set-piece analysis, we will show Bournemouth's tactics and gaps in defending corners and throw-ins.
Disclaimer: While AFCB don't have many tall players, which really matters, the scope of this set-piece analysis covers just the weaknesses in the system itself.
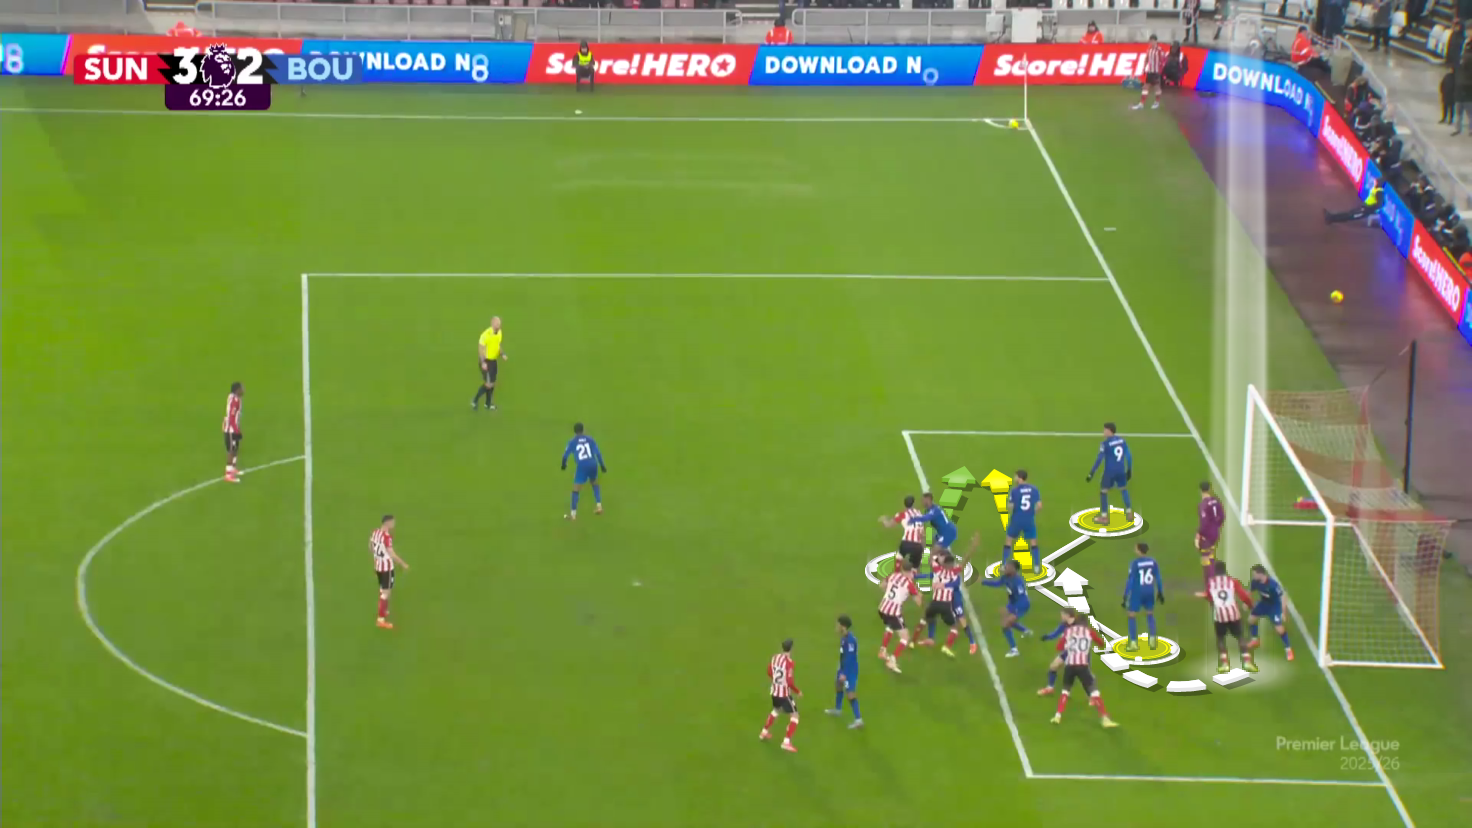
AFC Bournemouth Defending Corners Tactics
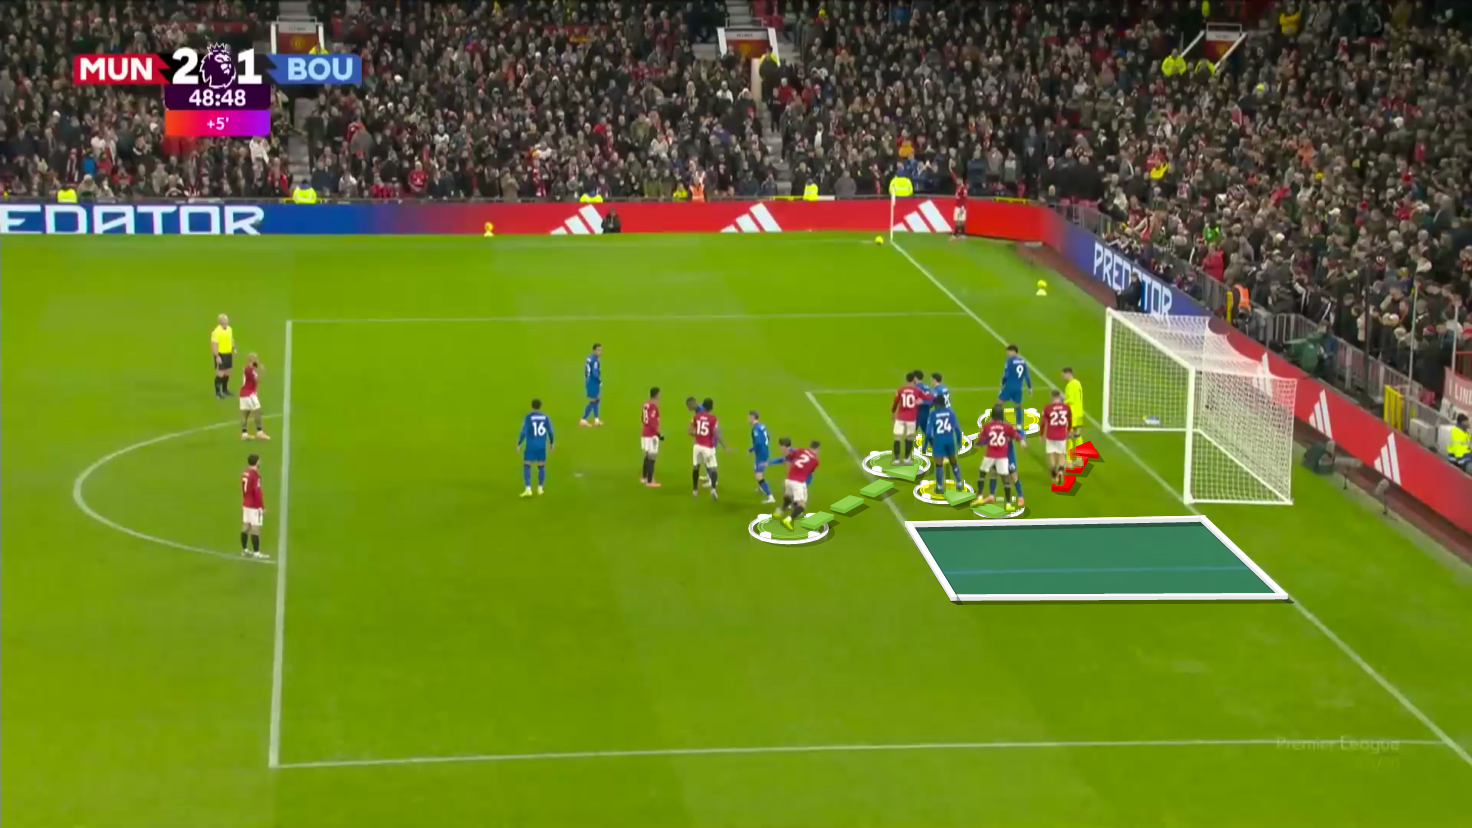
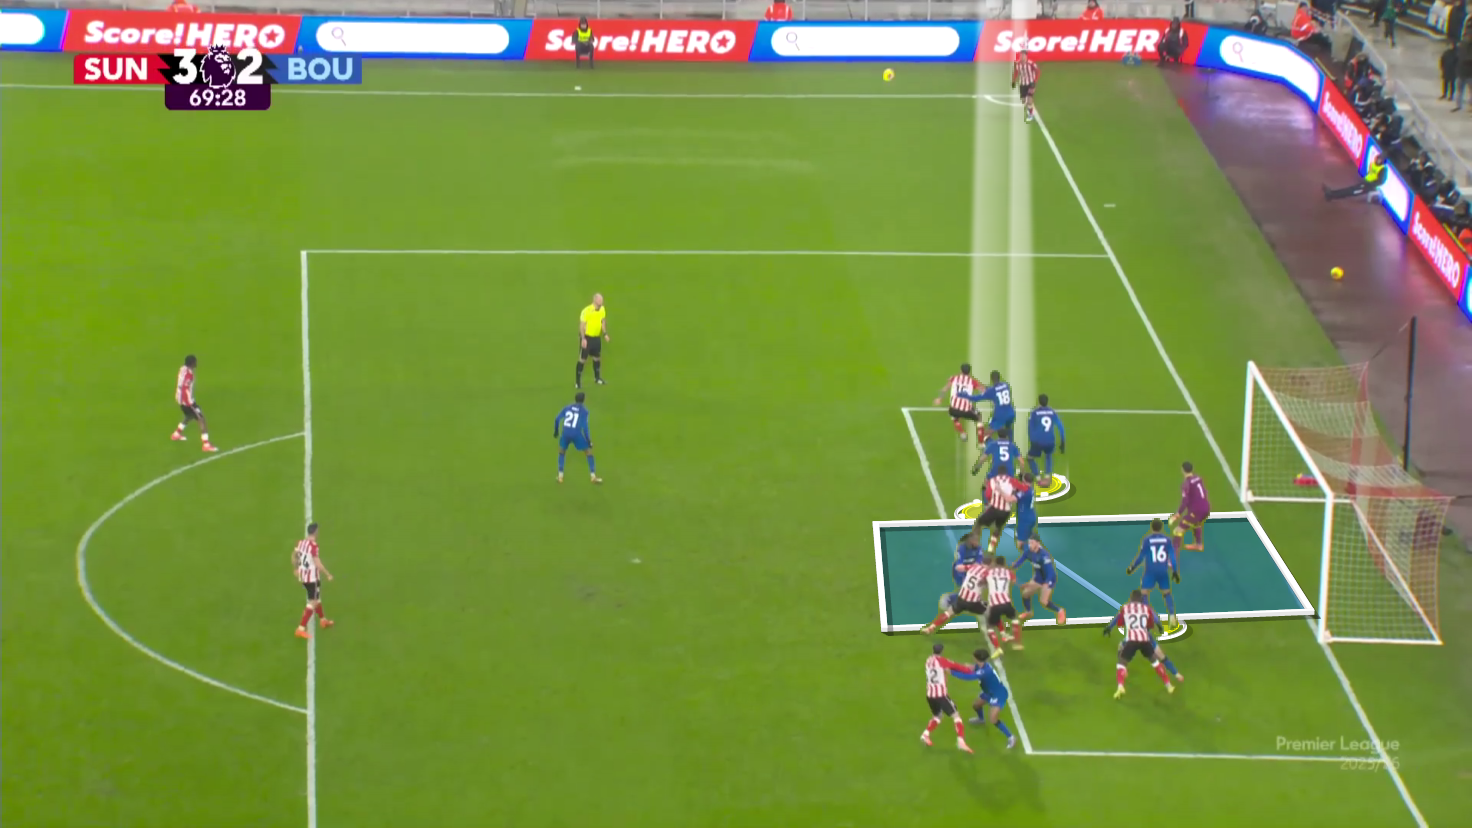
Starting with corners, you can see in Figure 1 below that they generally defend with three zonal defenders (yellow), two players on the edge of the box (green), asking one of them to go to defend short corners, and the rest are man-markers.

Let’s start by analysing their gaps at the far post.
You can see in Figure 2 below that Manchester United have their free player (red) block the goalkeeper from claiming the cross before going to the far post.
The free player doesn’t stick to the goalkeeper from the beginning, instead starting on his blind side and going to block after the taker’s signal.
The players in green go to block the last two zonal defenders from their blind side, dragging their man markers with them, evacuating the targeted area.
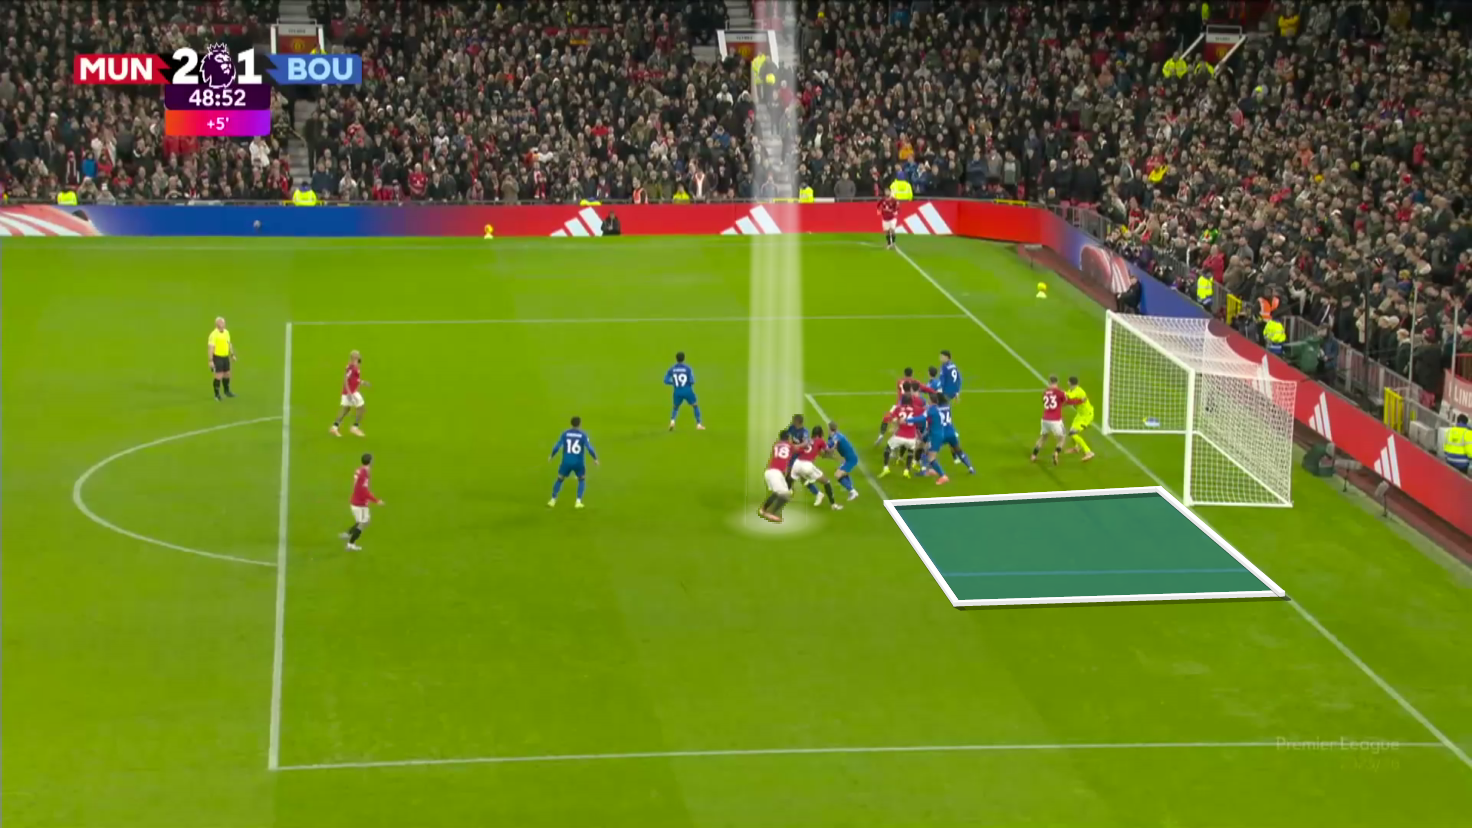
In Figure 3 below, you can see the target players exploit their usual weakness in man-marking.
Two opposing attackers start close to each other, while the target player (white) turns around the other (blue) using him as a screen, like in basketball.
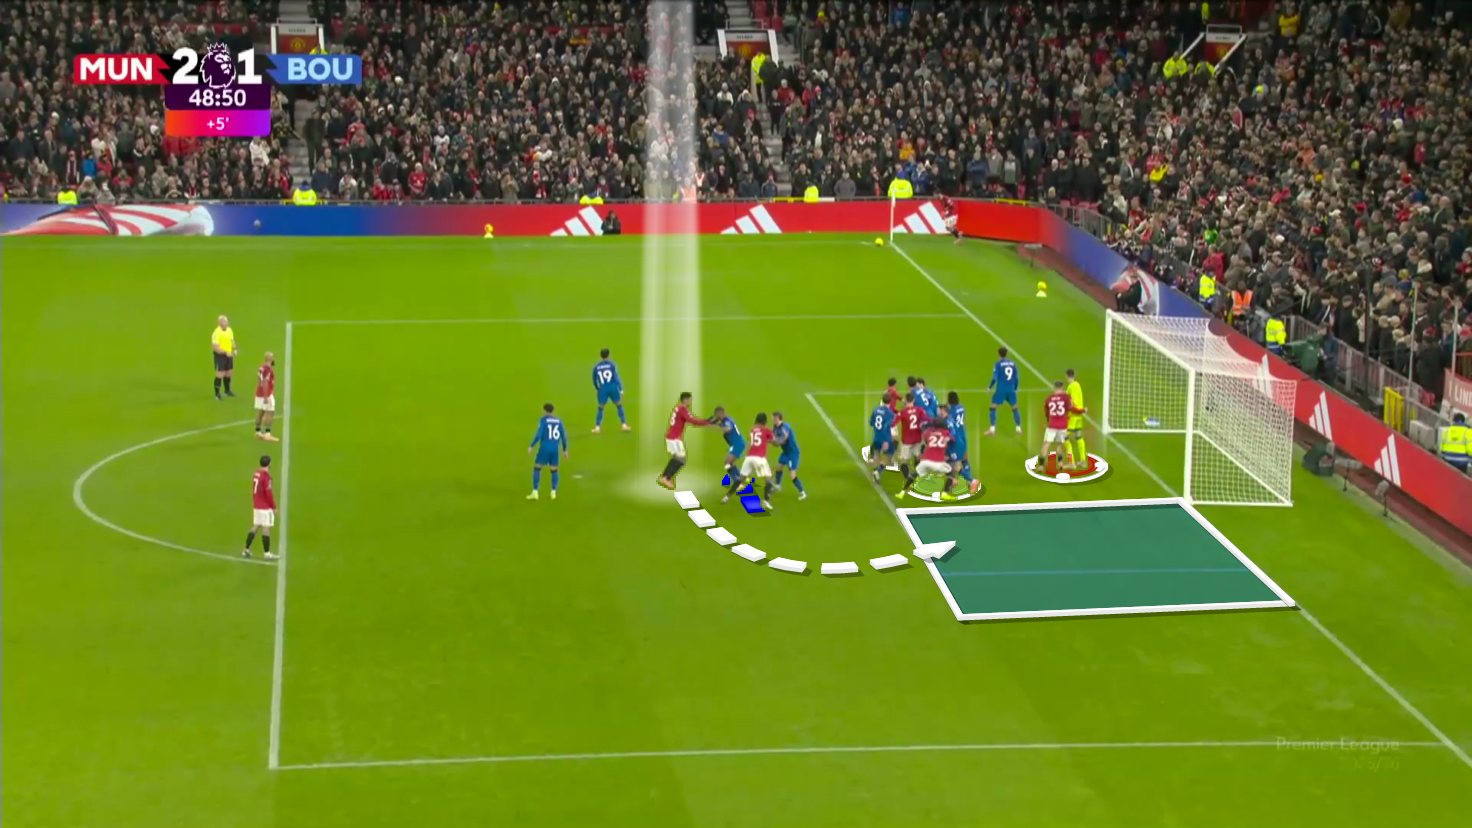
Figure 4 below shows the screen when the targeted player's teammate blocks his man to free him.
Now, all is set to block the zonal defenders, block the goalkeeper, and free the targeted player from his man.
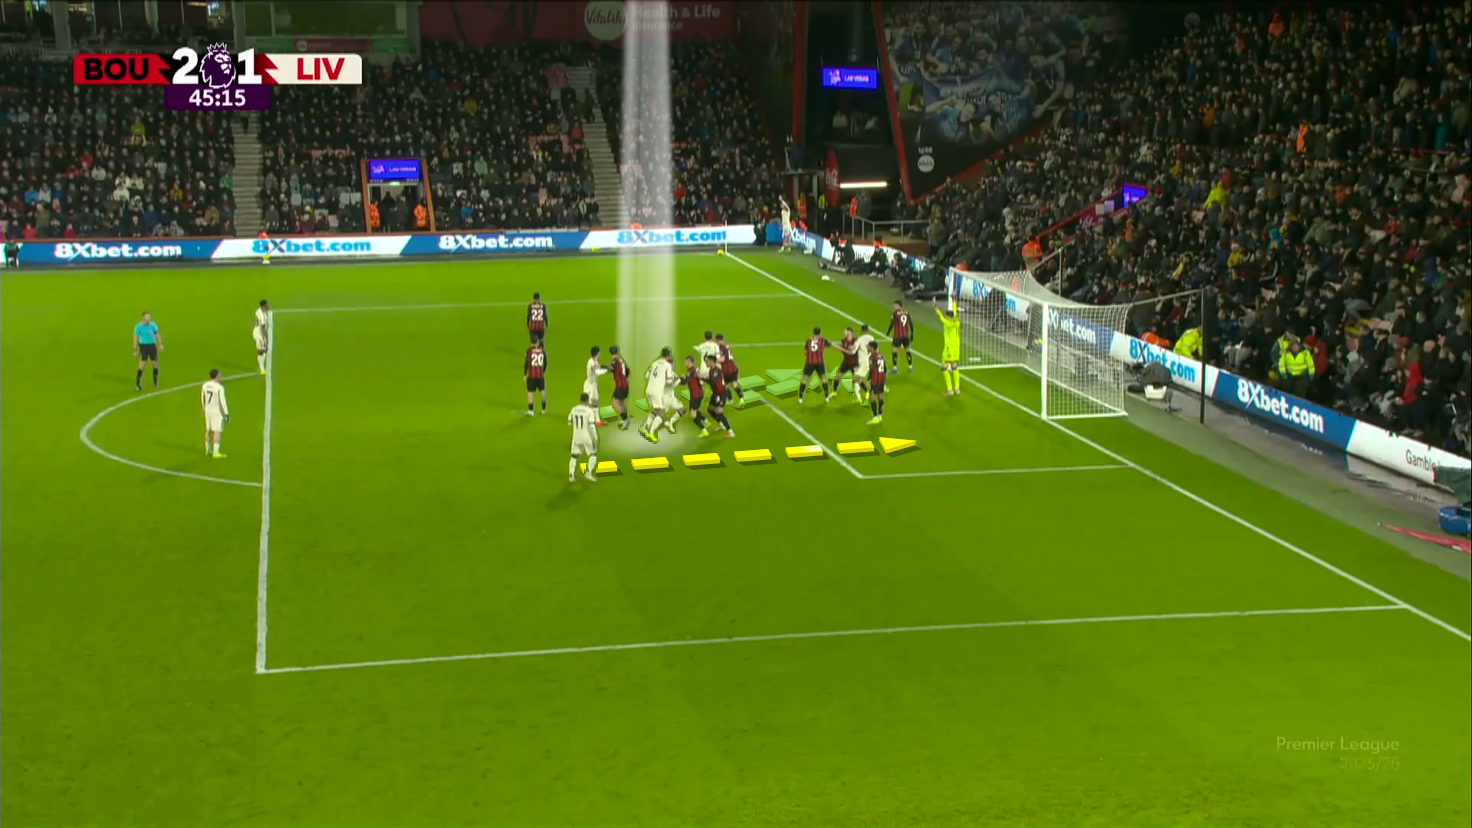
Going to their gaps on the near post, Figure 5 below shows the same system with three zonal defenders (yellow).
The problem is that there is no assigned defender whose sole job is defending the area ahead of the near post against flick-ons or direct shots.
As a result, the first zonal defender near the post is responsible for defending this area.
He also has to try to anticipate any runs ahead of him to go out and chase the ball in this area.
This is a difficult job, especially when the targeted player comes from the middle from his blind side, because when the ball is played, he will be forced to follow it in the air.
Then, Virgil van Dijk can suddenly cut from his blind side.
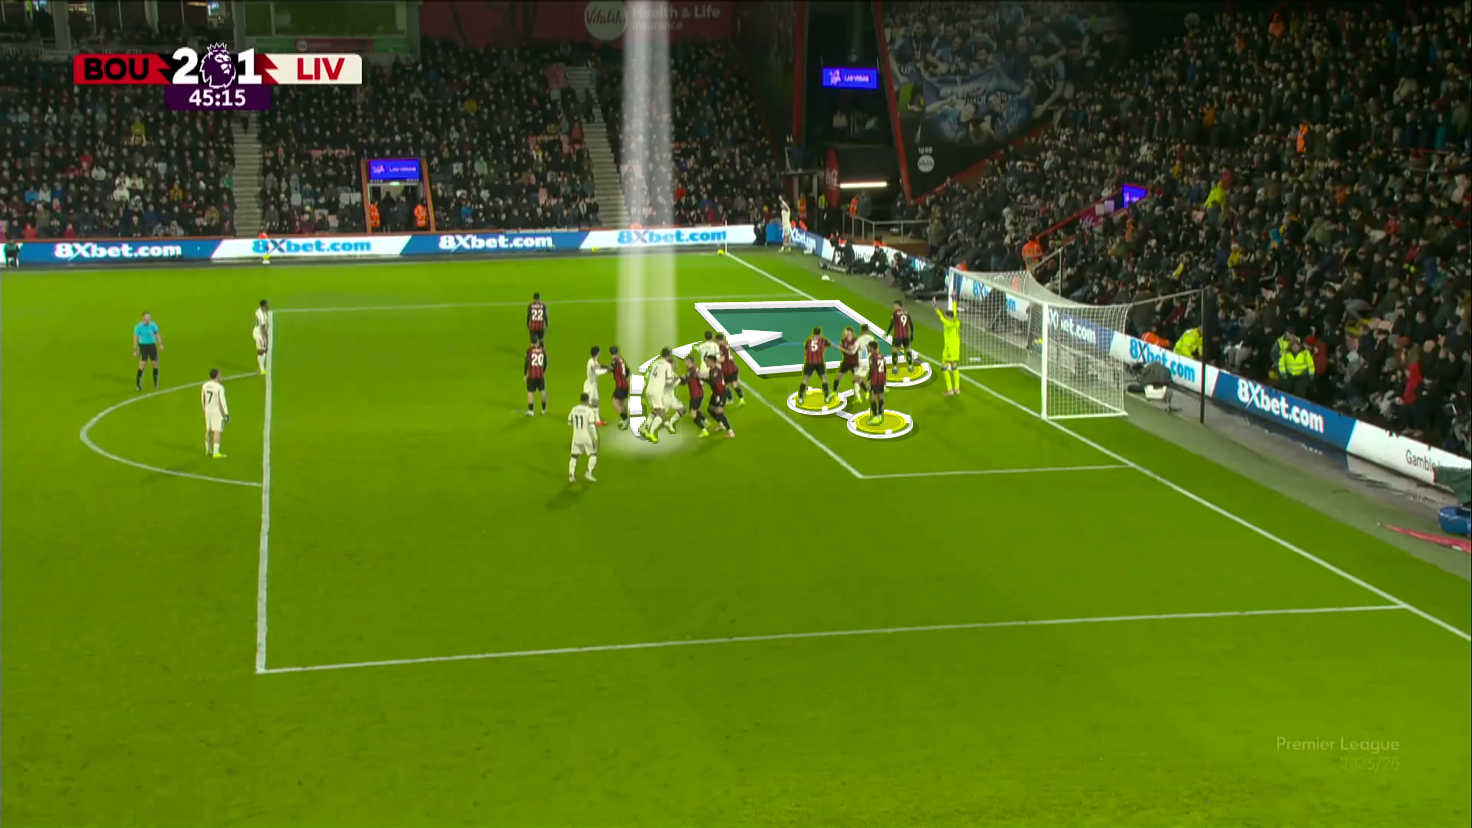
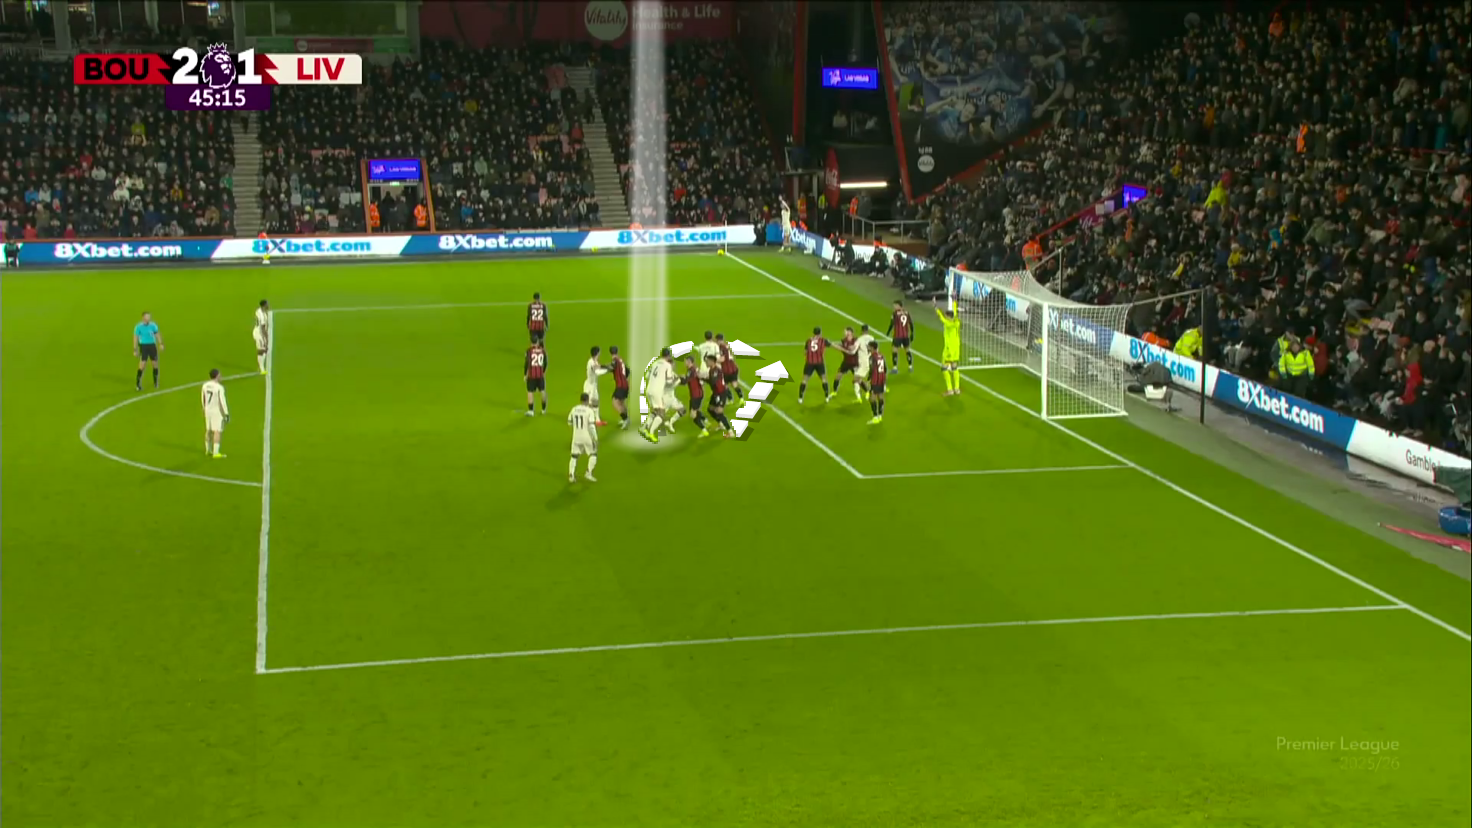
Figure 6 below shows that the situation will be difficult for the first zonal defender to leave his zone because three runners (green) run into the area behind him from different angles.
The far runner (yellow) will go to the far post late to get any possible flick-ons when the defenders focus on the first touch.
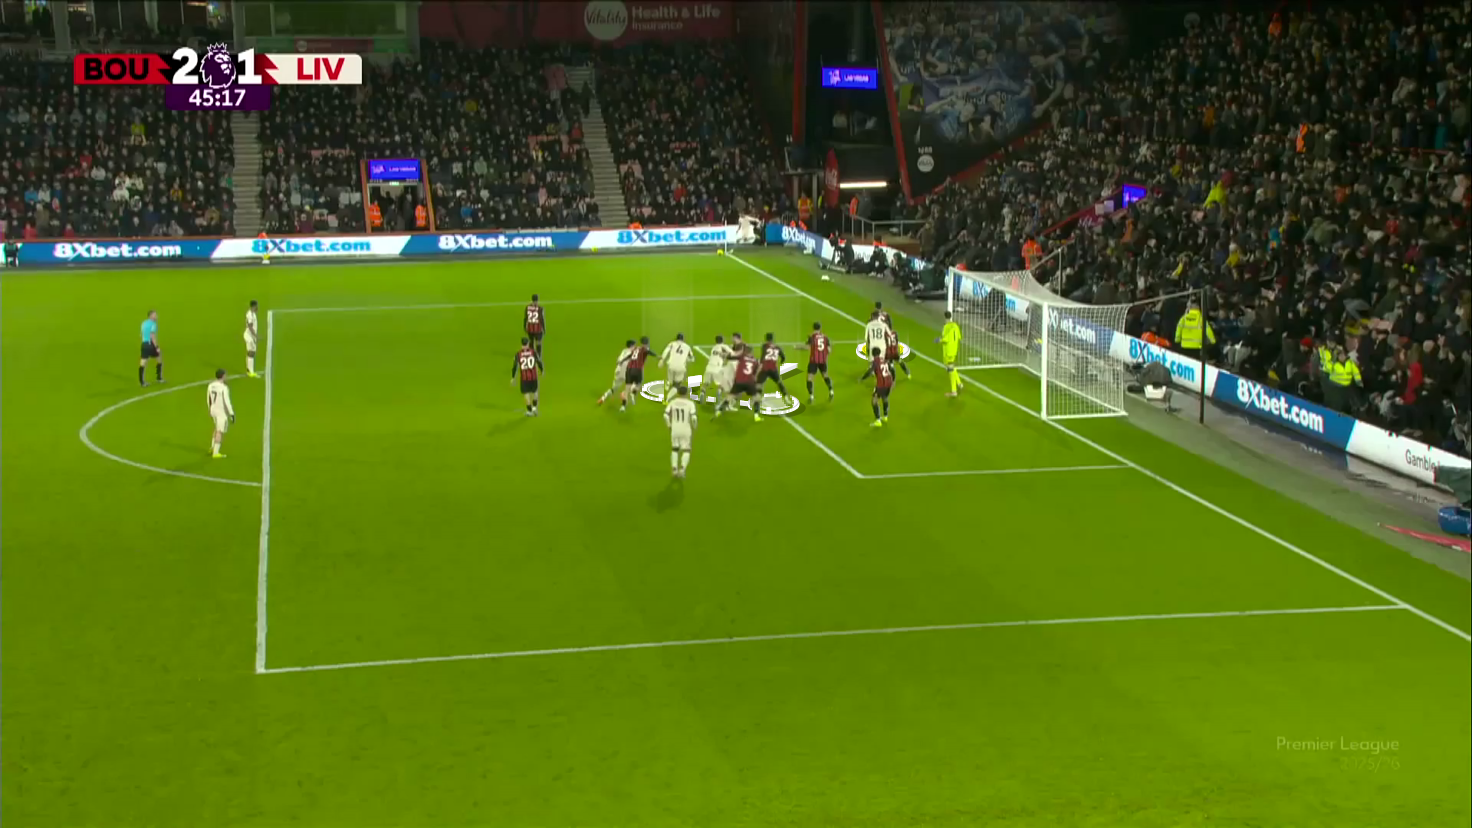
Now, we will focus on how the targeted player will be free from his man using the same weakness in man-marking.
Figure 7 below shows Virgil van Dijk standing behind his teammate in a stack, which separates him from his man marker.
Then, he suddenly makes a curved run into the targeted area when his marker runs to catch him, separating them.
Some defending teams prefer to ask the two man-markers to stand in a horizontal line, one step away from the runners, asking each man to take the runner into his side, whoever he is, and catch him grappling him as he starts to move.
The full separation is shown below: when the taker is about to hit the ball, the first zonal defender can't see the oncoming threat, resulting in a goal.
Going to the middle, we will highlight a crucial problem in their three-zonal-defender system, which is shifting.
As a defending team, you have just three players to defend the entire width of the goalmouth and the area ahead of the near post.
This is possible, but you should be very clear in your instructions to each zonal player about the area he should cover.
As in Figure 9 below, the green player makes a decoy run to the area ahead of the near post while the second zonal defender steps forward, widening the gap between him and the third zonal defender.
The targeted player (white) will attack it from their blind side.
As shown below, the blue area is the area between the second and the third zonal defender, which is huge for the targeted player (white).
The result was a goal.
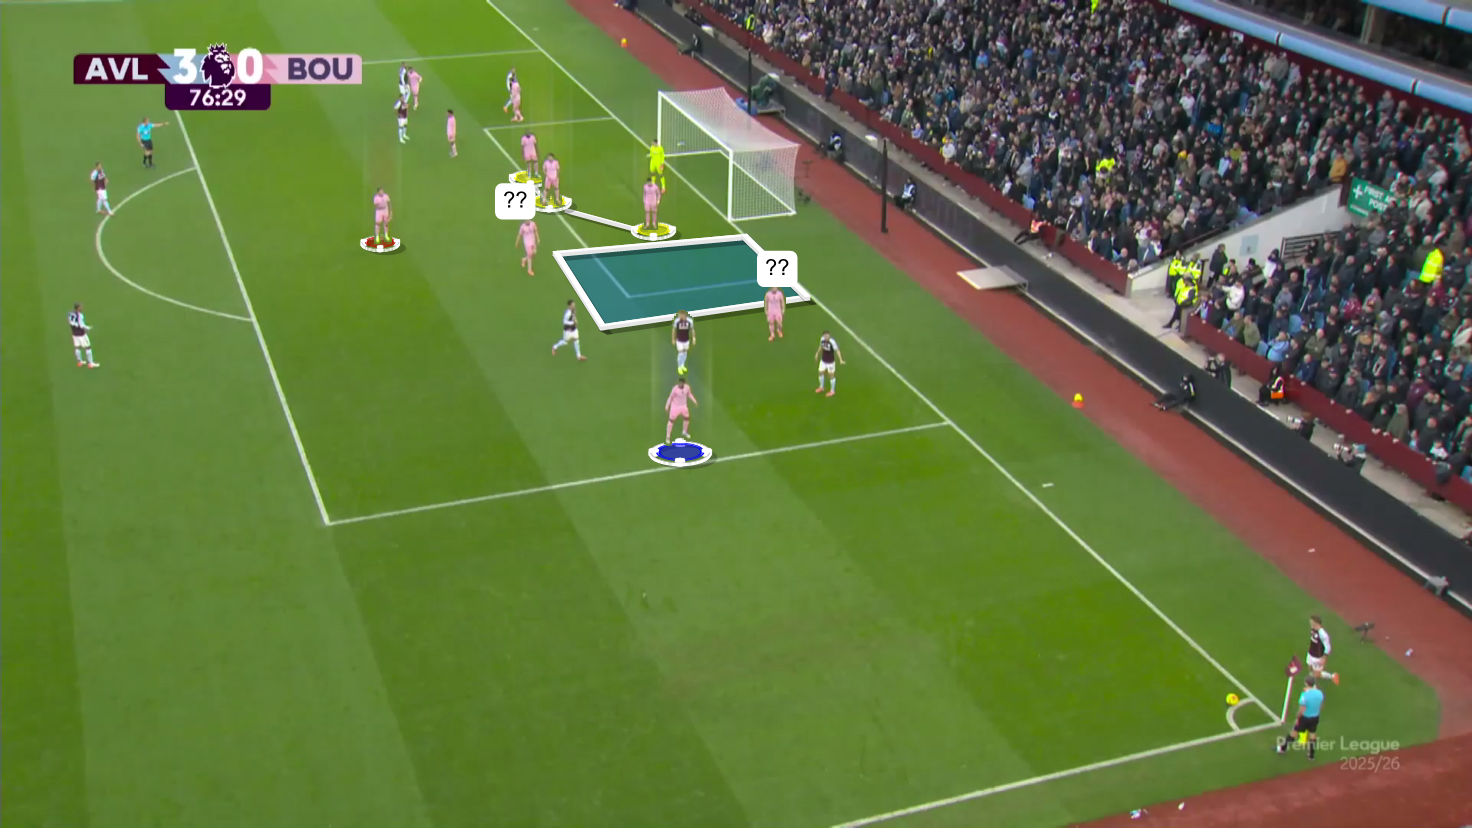
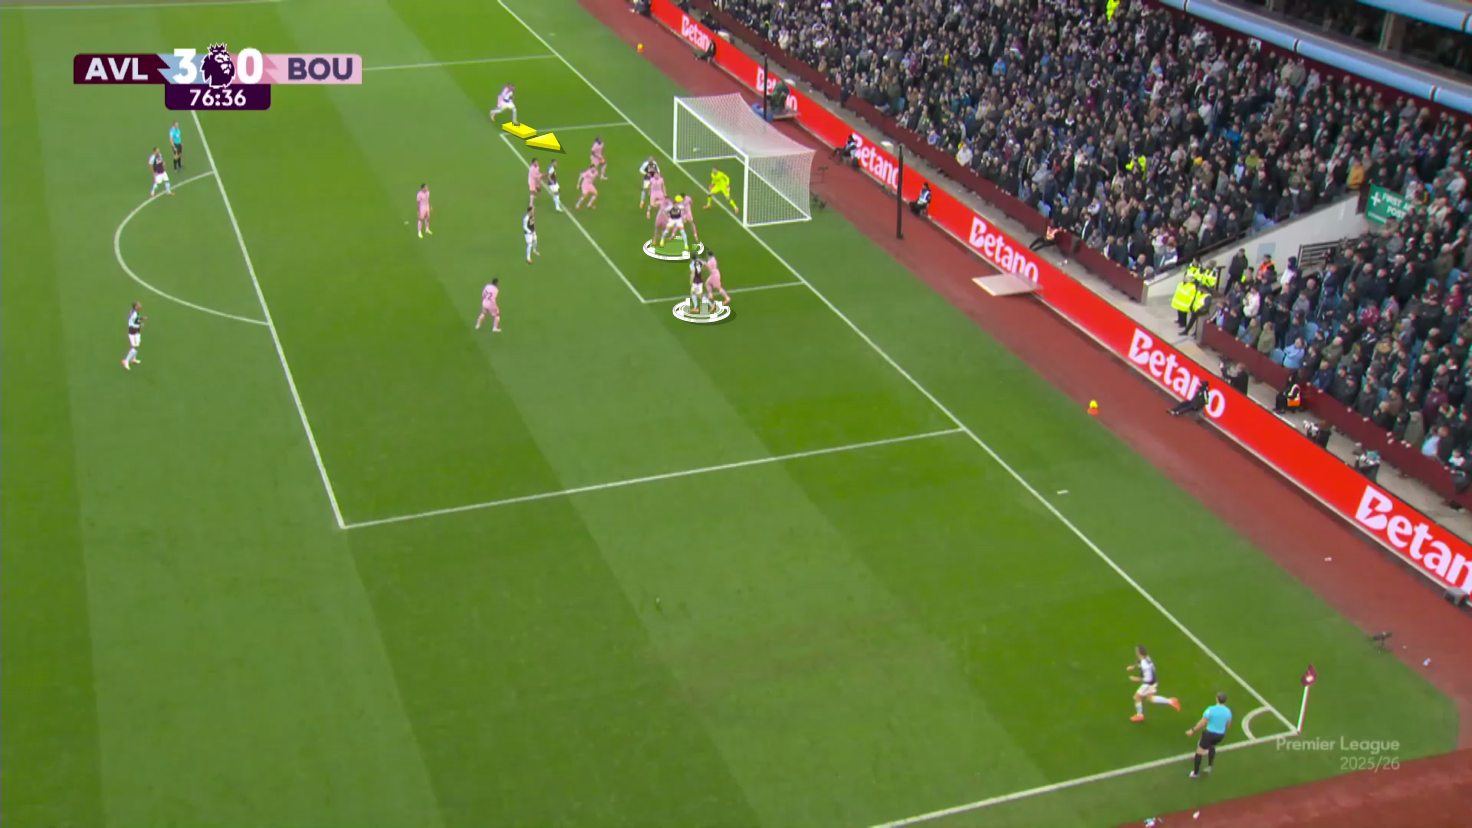
Going to short corners, Aston Villa manipulated them with a double-weapon approach, making them hesitate between defending the near post and short corners.
As in Figure 11, they have the same three zonal defenders (yellow), one player for short corners (blue), one player (red) for the rebound and the rest are man markers.
Aston Villa put three players far beyond the far post, taking three man markers and three players so close behind the short-option defender, knowing that the two targeted players are among them (Pau Torres and Ross Barkley), which makes the remaining two man markers hesitate between following them or taking some steps back to defend the box.
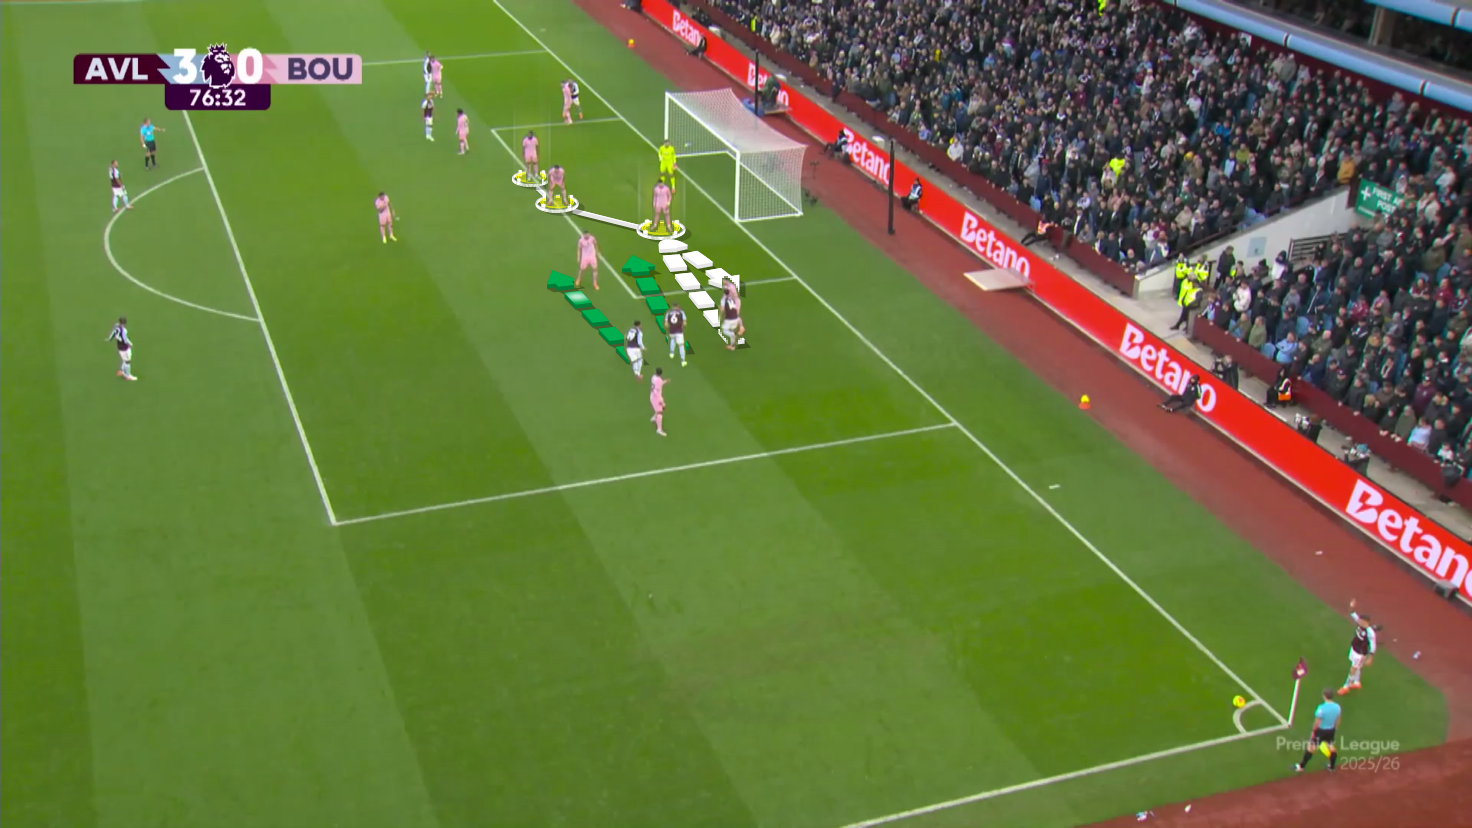
As shown below, they suddenly go back to the near post.
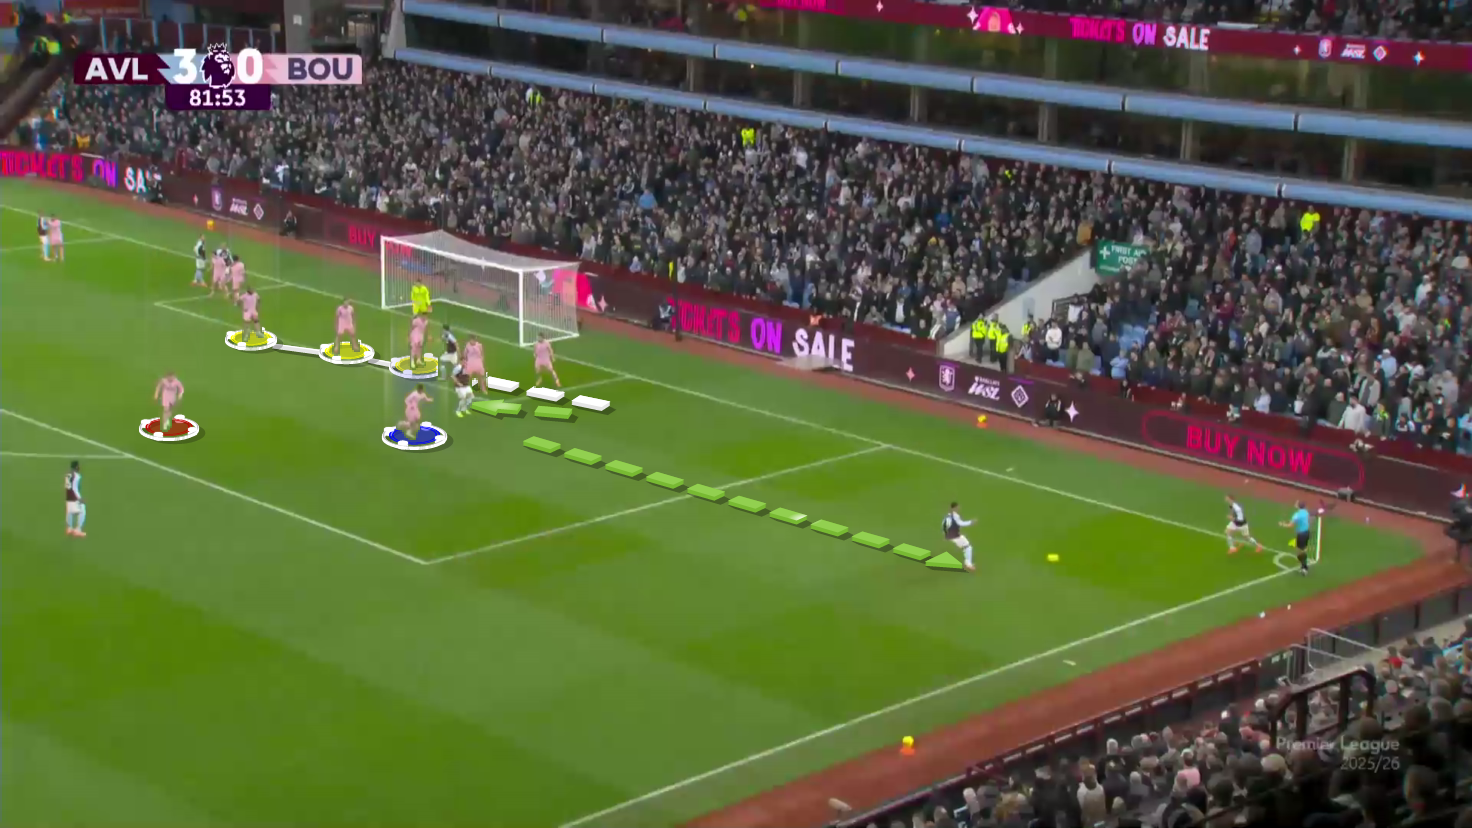
The player in white will turn around, trying to flick the cross, and the two players in green attack the near post against just one man marker.
You can see in Figure 13 below that the player highlighted in white exploits these runs backwards and turns around to separate from his marker, while a green player attacks the near post behind him.
The man marker hesitates to follow him and the other green player.
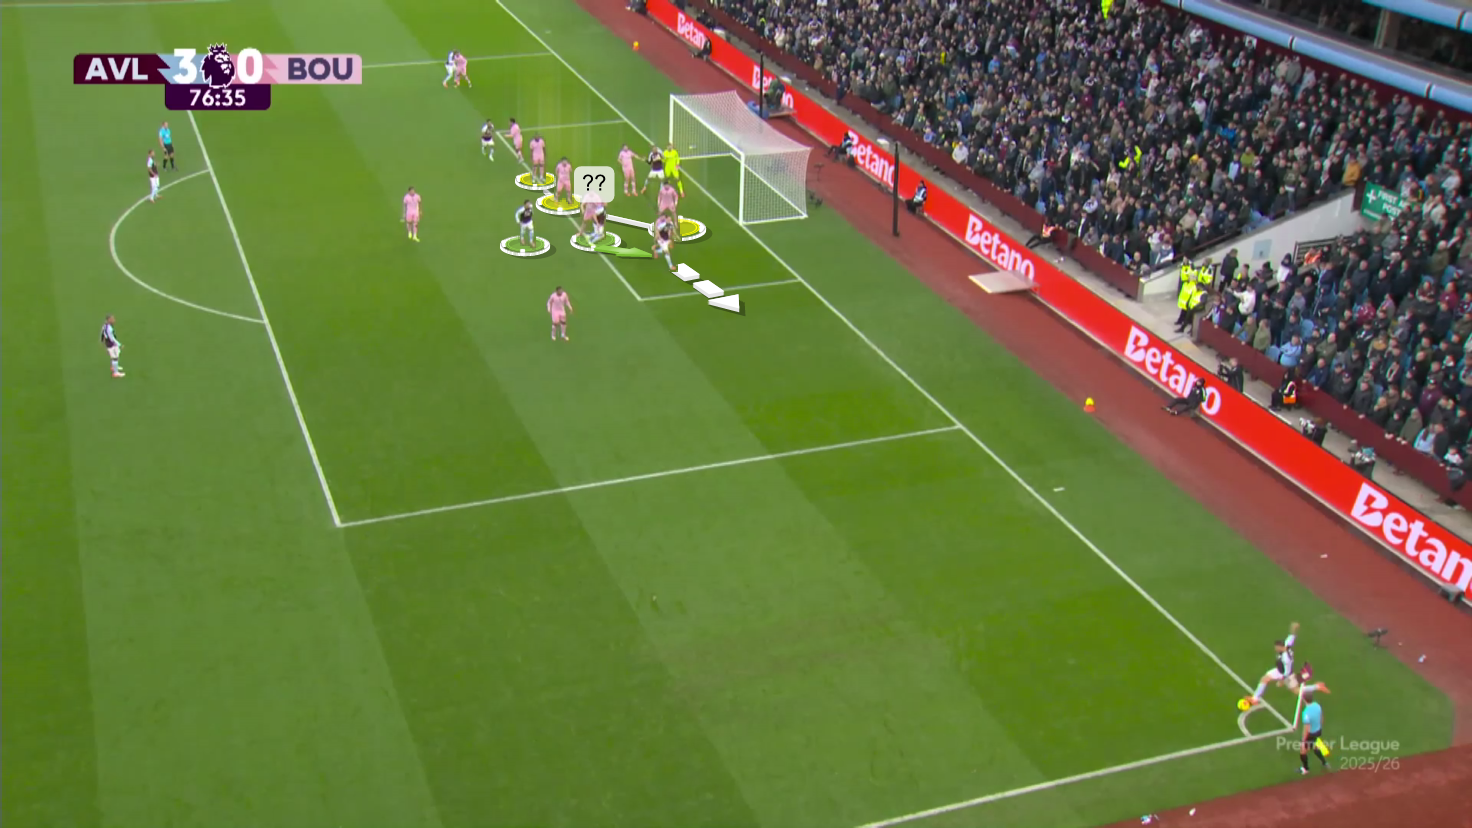
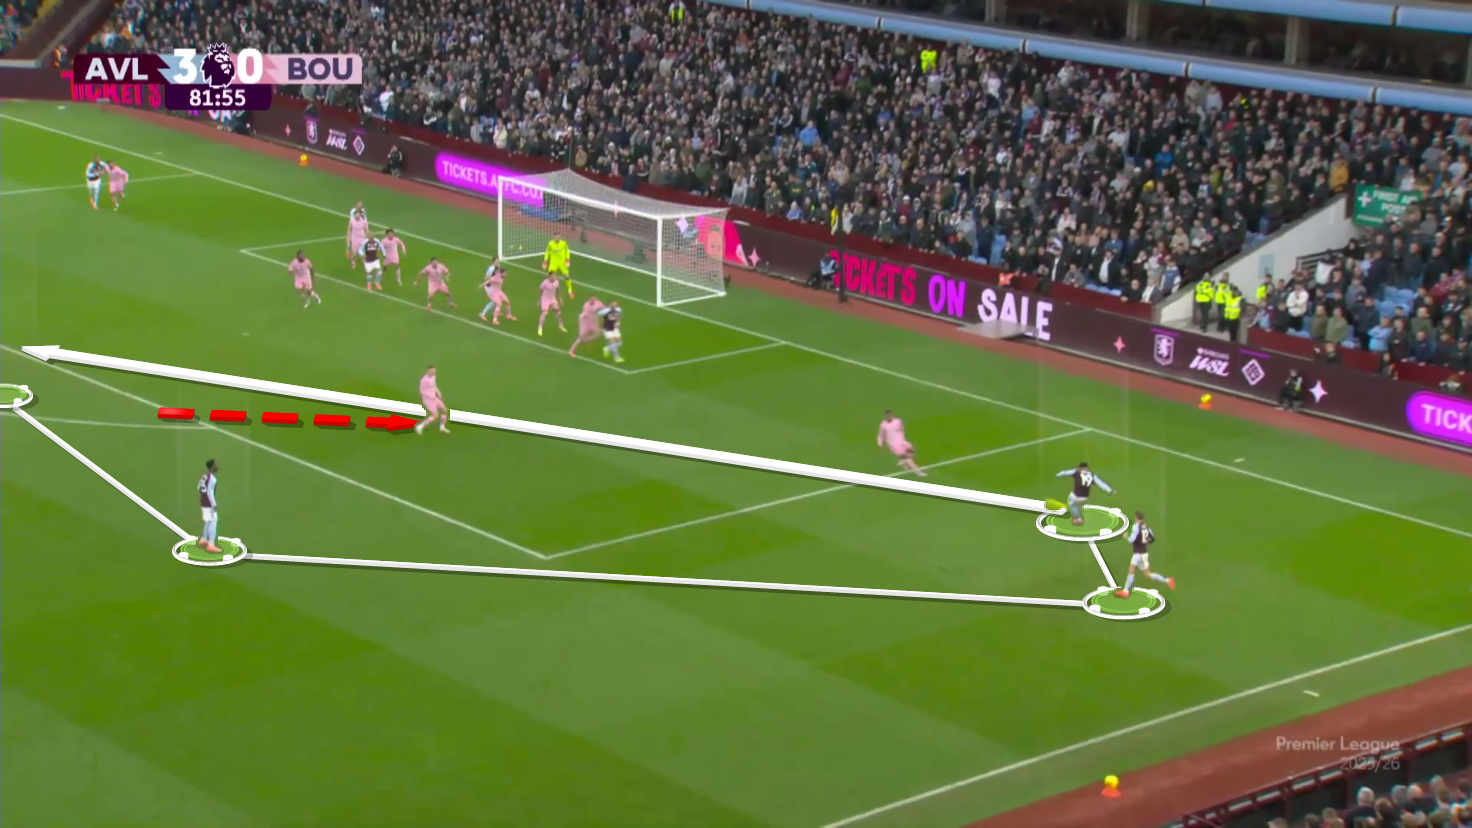
As shown below, the ball reached the green player, who put it directly into the net while a far yellow runner runs to frame the goal, ready to get any flick-ons after separating from his marker thanks to his far position and late timing of the run.
After that, they start in the same way, but one player suddenly runs close to the taker while Bournemouth's full team is in the box, as shown below.
This forces the rebound player to come closer to help, leaving the edge of the box empty.
The ball is passed to the far attacker standing on the edge of the box, ending with a goal.
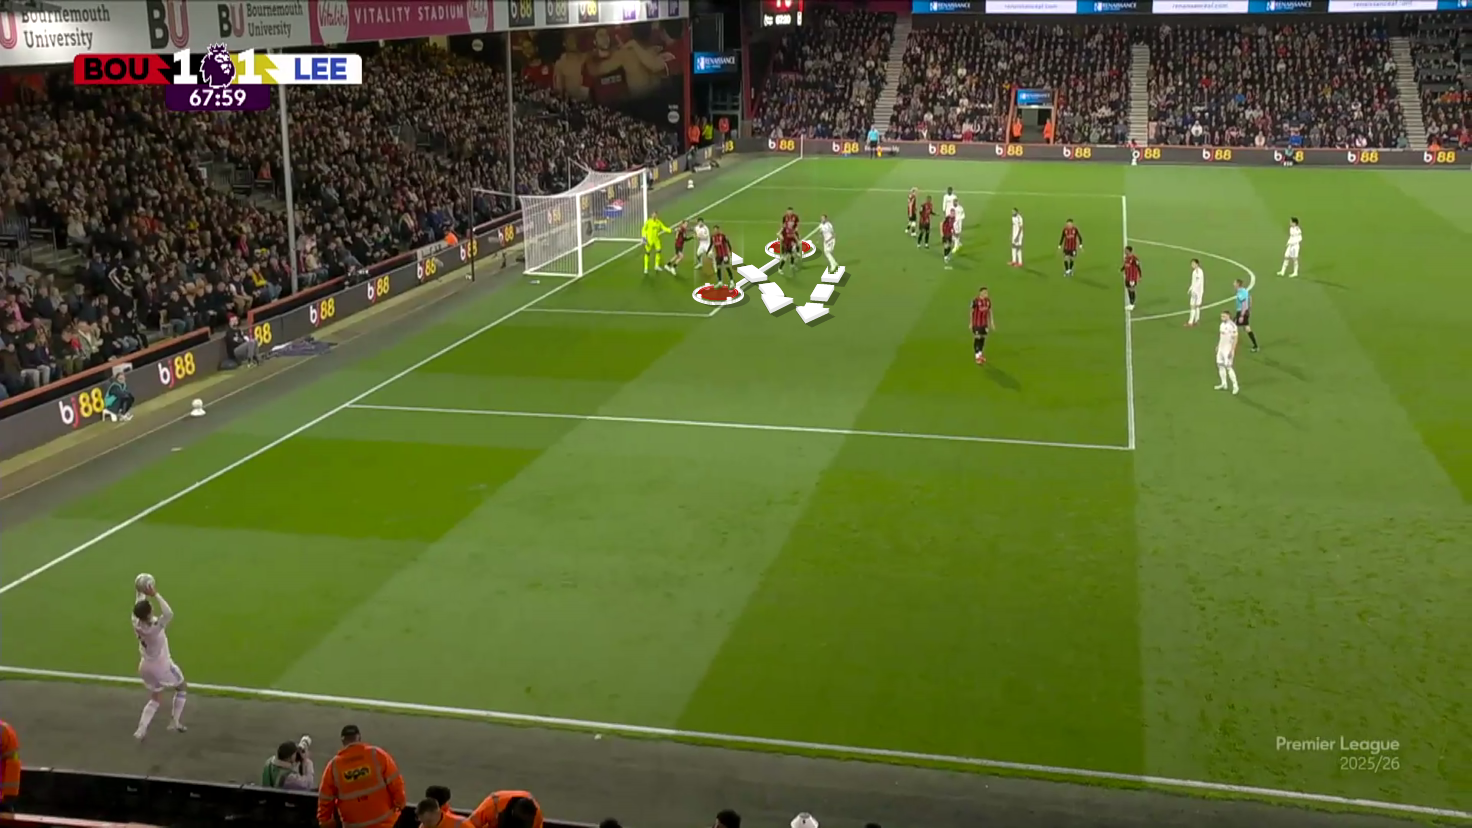
AFC Bournemouth Defending Throw-Ins Tactics
In throw-ins, Bournemouth suffer from the same blind-side runs and blocks, as well as from the traditional, ineffective way of man-marking.
In Figure 17 below, they use a man-marking system with just two zonal defenders (red), while the two targeted players stand on the first zonal defender's blind side to cut off the ball before he can reach it, coming from two different angles.


![Palermo Vs Catanzaro [2–0] – Serie B Playoff Semi-Final Second-Leg 2025/2026: Alberto Aquilani Tactics Survive Filippo Inzaghi Rally – Tactical Analysis](https://cdn.mymidnight.blog/77f959f119f4fb2321e9ce801e2f5163/size/w600/2026/05/Palermo-Vs-Catanzaro-20252026.png)